How to create a dynamic pop-up
A dynamic pop-up is a powerful tool for gaining valuable information about your website visitors, such as their email address, name, zip code etc. It appears automatically to unknown and known visitors either right when the visitor loads the URL on his browser or when he attempts to leave the website (yeap, ContactPigeon platform can identify that).
In the context of e-commerce, pop-ups are used to capture visitor info. You can offer a discount or a promo code for the next purchase in exchange for the information that the user will provide. Pop-ups can be also used to interact with visitors dynamically as they browse thru your website. Some example of such use can be:
- Inform visitor of new collections
- Cross / up-sell products based on product category view
- Show support line when visitor views help pages over 2 times
Table of Content
- Navigate to Dynamic Pop-ups
- Select a template and choose Pop-up triggers
- Customize Pop-up designs
- Preview, Save, and Activate Your Pop-up
Navigate to Dynamic Pop-ups
1. Navigate to the Dynamic Pop-ups section from the sidebar menu.

2. Choose +Create new Pop-up.

Select a template and choose Pop-up triggers
3. Choose design settings. You can either pick a template - step1 - through our gallery or skip this step to start from a blank template.

4. If you continue to step 2 you will have the opportunity to select how you would like the pop-up to be triggered.

If you choose "On exit - unknown visitors", for instance, the pop up will be triggered only if an unknown visitor is about to leave your site. Unknown visitors are those whom you do not have an identified contact info for (e.g., email address, account ID, etc). You will also be able to set up additional conditions on how the visitors will be chosen.
These conditions include:
- Minimum number of pages a visitor should have seen within the last 30 minutes
- Minimum duration visitor stayed on a page
- Percentage of a page viewed
- Whether if a visitor has made any "add to cart" action
Lastly, you can set whether how frequently the pop-up should display to the same visitor who matches the specified conditions per session. By default, the suppression period is set to 24 hours to avoid visitor annoyance with frequent pop-ups.

If you want to edit additional conditions, scroll to the right and the following options appear.

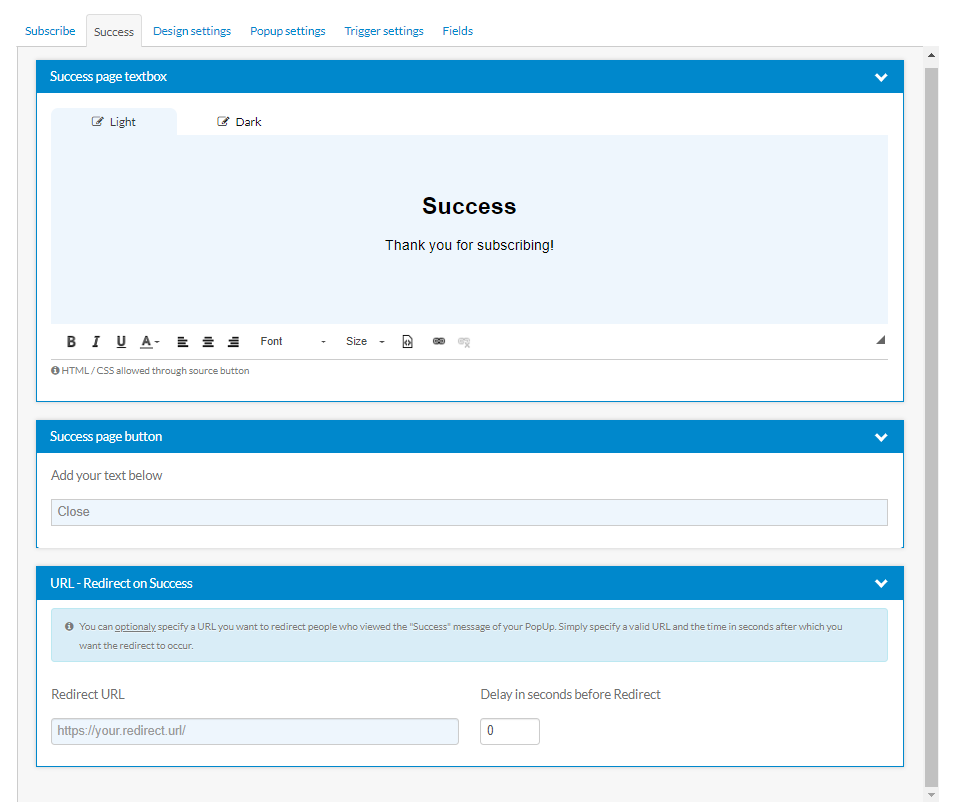
Customize Pop-up designs
5. If you skip the former two steps you will go with the default template.
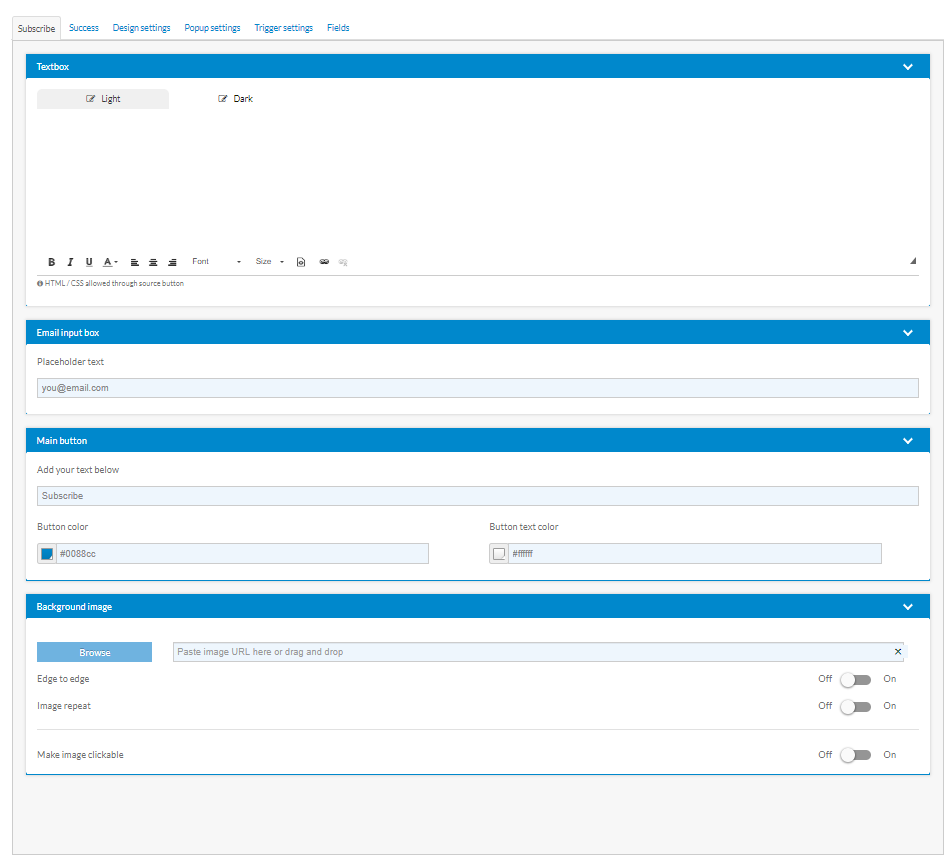
- Textbox: Edit and format the copy
- Email input box: Edit the placeholder text for the email field
- Main Call to Action Button: Change the text and appearance
- Background image: Choose the background image of your preference

- Template gallery: You can pick a template through our gallery.
- Change the way your pop-up looks: You can choose on whether the email address on the input box will be on or off. You can decide on the Button Visibility, choose the background color of your pop-up and the close button color. You can also opt for the edges of the pop-up, and which position on the page the pop-up will appear. (Top Left, Top Right, Center, Bottom Left, and Bottom Right).
- Pop-up size: Edit the height and width of your pop-up by choosing manual on the right of the box.
- Custom CSS: Enter your custom CSS and press apply.
- Custom Javascript: Enter your custom Javascript and press apply.

- Pop-up name: You can give the name of the pop-up you like. This will only be visible to you.
- Contact list: You can pick a list to save your new contacts.
- Delivery method: This is to define whether you want your pop-up to appear inside an iframe or not.
- Checkbox: You click to enable the checkbox for the user to accept T&C (Terms & Conditions).
- Double opt-in: You can enable or disable it. Keep in mind that in some countriew it's mandatory to have a double ot-in registration flow.
- On Exit - unknown visitors: The pop-up appears to unknown (no email) visitors when they move the mouse towards the exit button of the browser.
- On Load - unknown visitors: The pop-up appears to unknown visitors when they load a page of your website in their browser.
- On Exit - known visitors: The pop-up appears to known visitors when they move the mouse towards the exit button of the browser.
- On Load - known visitor: The pop-up appears to known visitors when they load a page of your website in their browser.
All above options can be combined with the options of whether the visitors have added/haven't added something to their basket and/or have stayed at least some seconds on page and/or have scrolled at least x% of the page
- At the click of a button: The pop-up appears to either the known or the unknown visitors when they have clicked on a specific class or id point. At the same time, you can choose also if you want your visitor to have added/haven't added something to his basket.
- Custom rules: You can also create custom scenarios that trigger your pop-ups just by filling the drop-down menus as you see in the photo below:


You can easily add or remove fields by going to the Fields tab and activate or deactivate the type of field you want. There is also the possibility to create your own custom fields just by activating the Custom field 1, 2, 3 and giving the respective names.

Preview, Save, and Activate Your Pop-up
At any stage of the creation process, you can preview how the pop-up will look like on your website just by clicking the icons in the top-right:

Once you are happy with the design, click the "Save changes" button on the upper right side of the editor, turn on the activation button and just click again the "Save changes" button and your pop-up is ready!
